Let’s face it: shuffling disks is a pain. So if you have a lot of DVDs or Blu-Ray discs, you may want to rip some of your favorites on the hard drive of your computer. You’ll also have to rip your DVDs or Blu-Rays to the computer if you want to watch them on one of your mobile devices, such as a mobile phone or tablet PC, or a TV or computer without a DVD or Blu-Ray player. HandBrake is a free, open source program that that encodes DVD and Blu-Ray files so that you can enjoy them wherever and whenever you like. HandBrake installs on Windows, Mac or Linux, and also has the ability to encode HD-DVD, AVCHD/AVCHD Lite discs, as well as professional video formats like ProRes and DNxHD.
Typically, if you own a disc, it is legal to create a copy for your own personal use. So as long as you use your copy for your own personal viewing, and you never use it for any illegal purpose (i.e. contribute the file to P2P or bittorrent sharing sites, upload it to video sites, copy it and sell it or give it away or charge admission for performances), you should be well within the limits of the law. However, if you sell the DVD or Blu-Ray disc or give it away, be sure to delete the corresponding files from your devices.
If you run into problems trying to rip copy protected DVDs, you’ll need to install libdvdcss.
This tutorial was performed in Ubuntu 18.04 Bionic Beaver.
Install HandBrake
Probably the easiest way to get HandBrake in Linux is to install it in Flatpak directly from Flathub. If you’re not familiar with it yet, Flatpak is a command-line utility that allows you to quickly and easily install up-to-date versions of software programs for Linux. Instructions on how to install Flatpak are here. Be sure to install your distribution’s Flatpak package prior to installing the HandBrake Flatpak. Then type these commands in the terminal:
flatpak --user install https://flathub.org/repo/appstream/fr.handbrake.ghb.flatpakrefOr if you prefer, you can download the HandBrake Flatpak directly from HandBrake.fr and install it with the command:
flatpak install HandBrake-version.flatpak
Replace “version” with the specific version of Handbrake which you downloaded.
To run, type:
flatpak run fr.handbrake.ghb
If you prefer to install from your distribution’s repositories, then check the documentation of your particular Linux distro to determine what you need to run HandBrake.
Once successfully installed, you can run the program by typing “handbrake” at the command line or by selecting the command from the program menus. (Please note that if you use the terminal to open a program, you must keep that terminal open until you’re finished using the program.)
Open the DVD or Blu-Ray Source
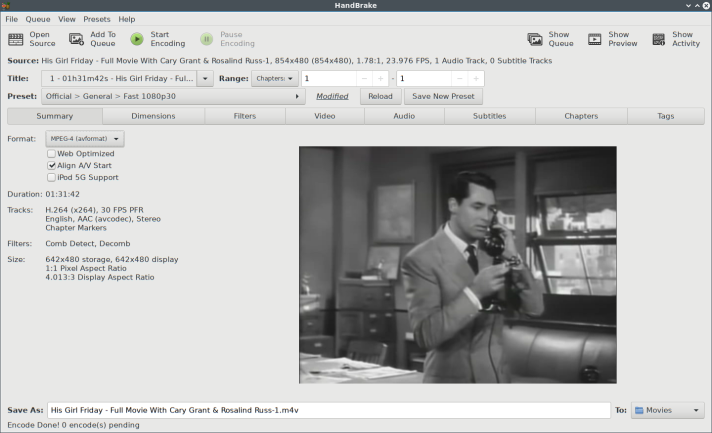
To open your DVD or Blu-Ray, you can select File – Open Source or File – /dev/sdx where “x” is the number of your DVD or Blu-Ray drive. HandBrake will scan your disc. Be patient: this process may take a while.
If HandBrake has difficulty loading your disc, try selecting File – Open Single Title. If the disc still doesn’t load properly, clean it and try to load it again.
If you still get the “No Title Found” error after trying to load the video several times, it may be because the DVD is copy protected.
If you like, you can select the “Show Preview” button to see a preview of your video.
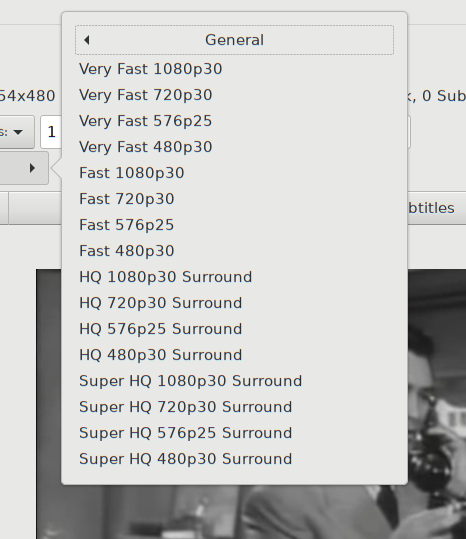
Select a Preset to Encode the DVD or Blu-Ray Disc
The presets are fairly self-explanatory, but they’re still worth some review. For example, if you just want to watch the DVD or Blu-Ray on your computer, you could select “Fast 1080p30”. This preset may also be compatible with other devices, such as a tablet or a mobile phone. However, there are also presets for Android, Apple, Chromecast, Fire TV, Playstation, Roku, Windows Mobile, and Xbox. They sound good in theory, but for example, I tried using the Android preset to rip The Matrix, and found that the file was actually larger than if I created the file using “Fast 1080p30”. So it’s worth taking some time to try several different presets to see which one gets the best results. Click on the arrow at the end of the Preset bar to get a list of additional presets for different situations.
After you choose a preset, you can make selections in the Format area. If you plan to upload the video to a website, click the Web Optimized button. If you’re going to transfer the video to an iPod 5th generation or later, select iPod 5G support.
The default file format for HandBrake is “m4v”. This is basically just a different version of the “mp4” file format. The m4v format compatible with a large number of different devices. I successfully got this file format to play on VLC media player in Linux, as well as on my Android-based Amazon Fire Tablet. I also managed to get m4v files to play on my Roku 2 through the Plex Media Server.
The Dimensions, Filters and Video tabs can usually be left at the default settings. HandBrake’s presets use x264 or x265 encoders which use a Constant Rate Factor (RF). A lower RF has a higher quality than a higher RF. For 1080p full HD, an RF of 20-24 is recommended. Keep in mind that increasing the RF increases the file size of the final video.
In the Audio tab, you can select tracks and codecs for the final rip of your DVD or Blu-Ray disc. The default codec for audio is AAC avcodec, but under Track Selection you can select other codecs for audio passthru, such as MP3, AC-3, EAC-3, DTS, DTS-HD, TrueHD, and FLAC. You can also set a passthru fallback, and set audio encoder bitrate and quality in this tab.
In the Subtitle tab, you can click the Add button to add subtitle files in SRT format.
Select a Destination
At this point, it’s a good idea to create a new folder for your ripped DVDs and Blu-Rays. Then select the folder from the drop-down menu next to the “To:” field. If your folder doesn’t appear in the list, then click “Other” and navigate through your computer’s menus to find the folder you wish to use.
Start Ripping
Click the “Start Encoding” button to start the ripping process. Or if you prefer, you can click “Add to Queue” to encode the disc at a later time.
Keep in mind that the encoding process can take several hours to complete. You may need to disable your computer’s power management and screensaver or other scheduled tasks to finish it. Also, don’t shut your computer down or put it to sleep during encoding, or the ripped file may become corrupted, and you may have to start over.
If you absolutely have to turn the computer off or put it to sleep, then press the “Pause Encoding” button before doing so.
After your DVD or Blu-Ray disc has finished encoding, try loading it in a media player such as VLC to see whether it has encoded properly or not. Then you can use a USB cable or SD card to transfer to file to your mobile device, or a flash drive to transfer it to another computer.
Has this article been helpful? Have any questions? Feel free to post a comment below.
Support Living the Linux Lifestyle on Patreon.
Support Living the Linux Lifestyle on PayPal.
Additional Reading:
How to Install Plex Media Server in Ubuntu 18.04 Bionic Beaver
How to Install and Use Flatpak

nice one
LikeLike